Deploying a .NET Core WebApi Service on DiscountASP.NET
This step-by-step article shows you how to deploy the sample .NET Core WebApi application that comes with Visual Studio 2022 to DiscountASP.NET.
Building the Application
1. Launch Visual Studio 2022.
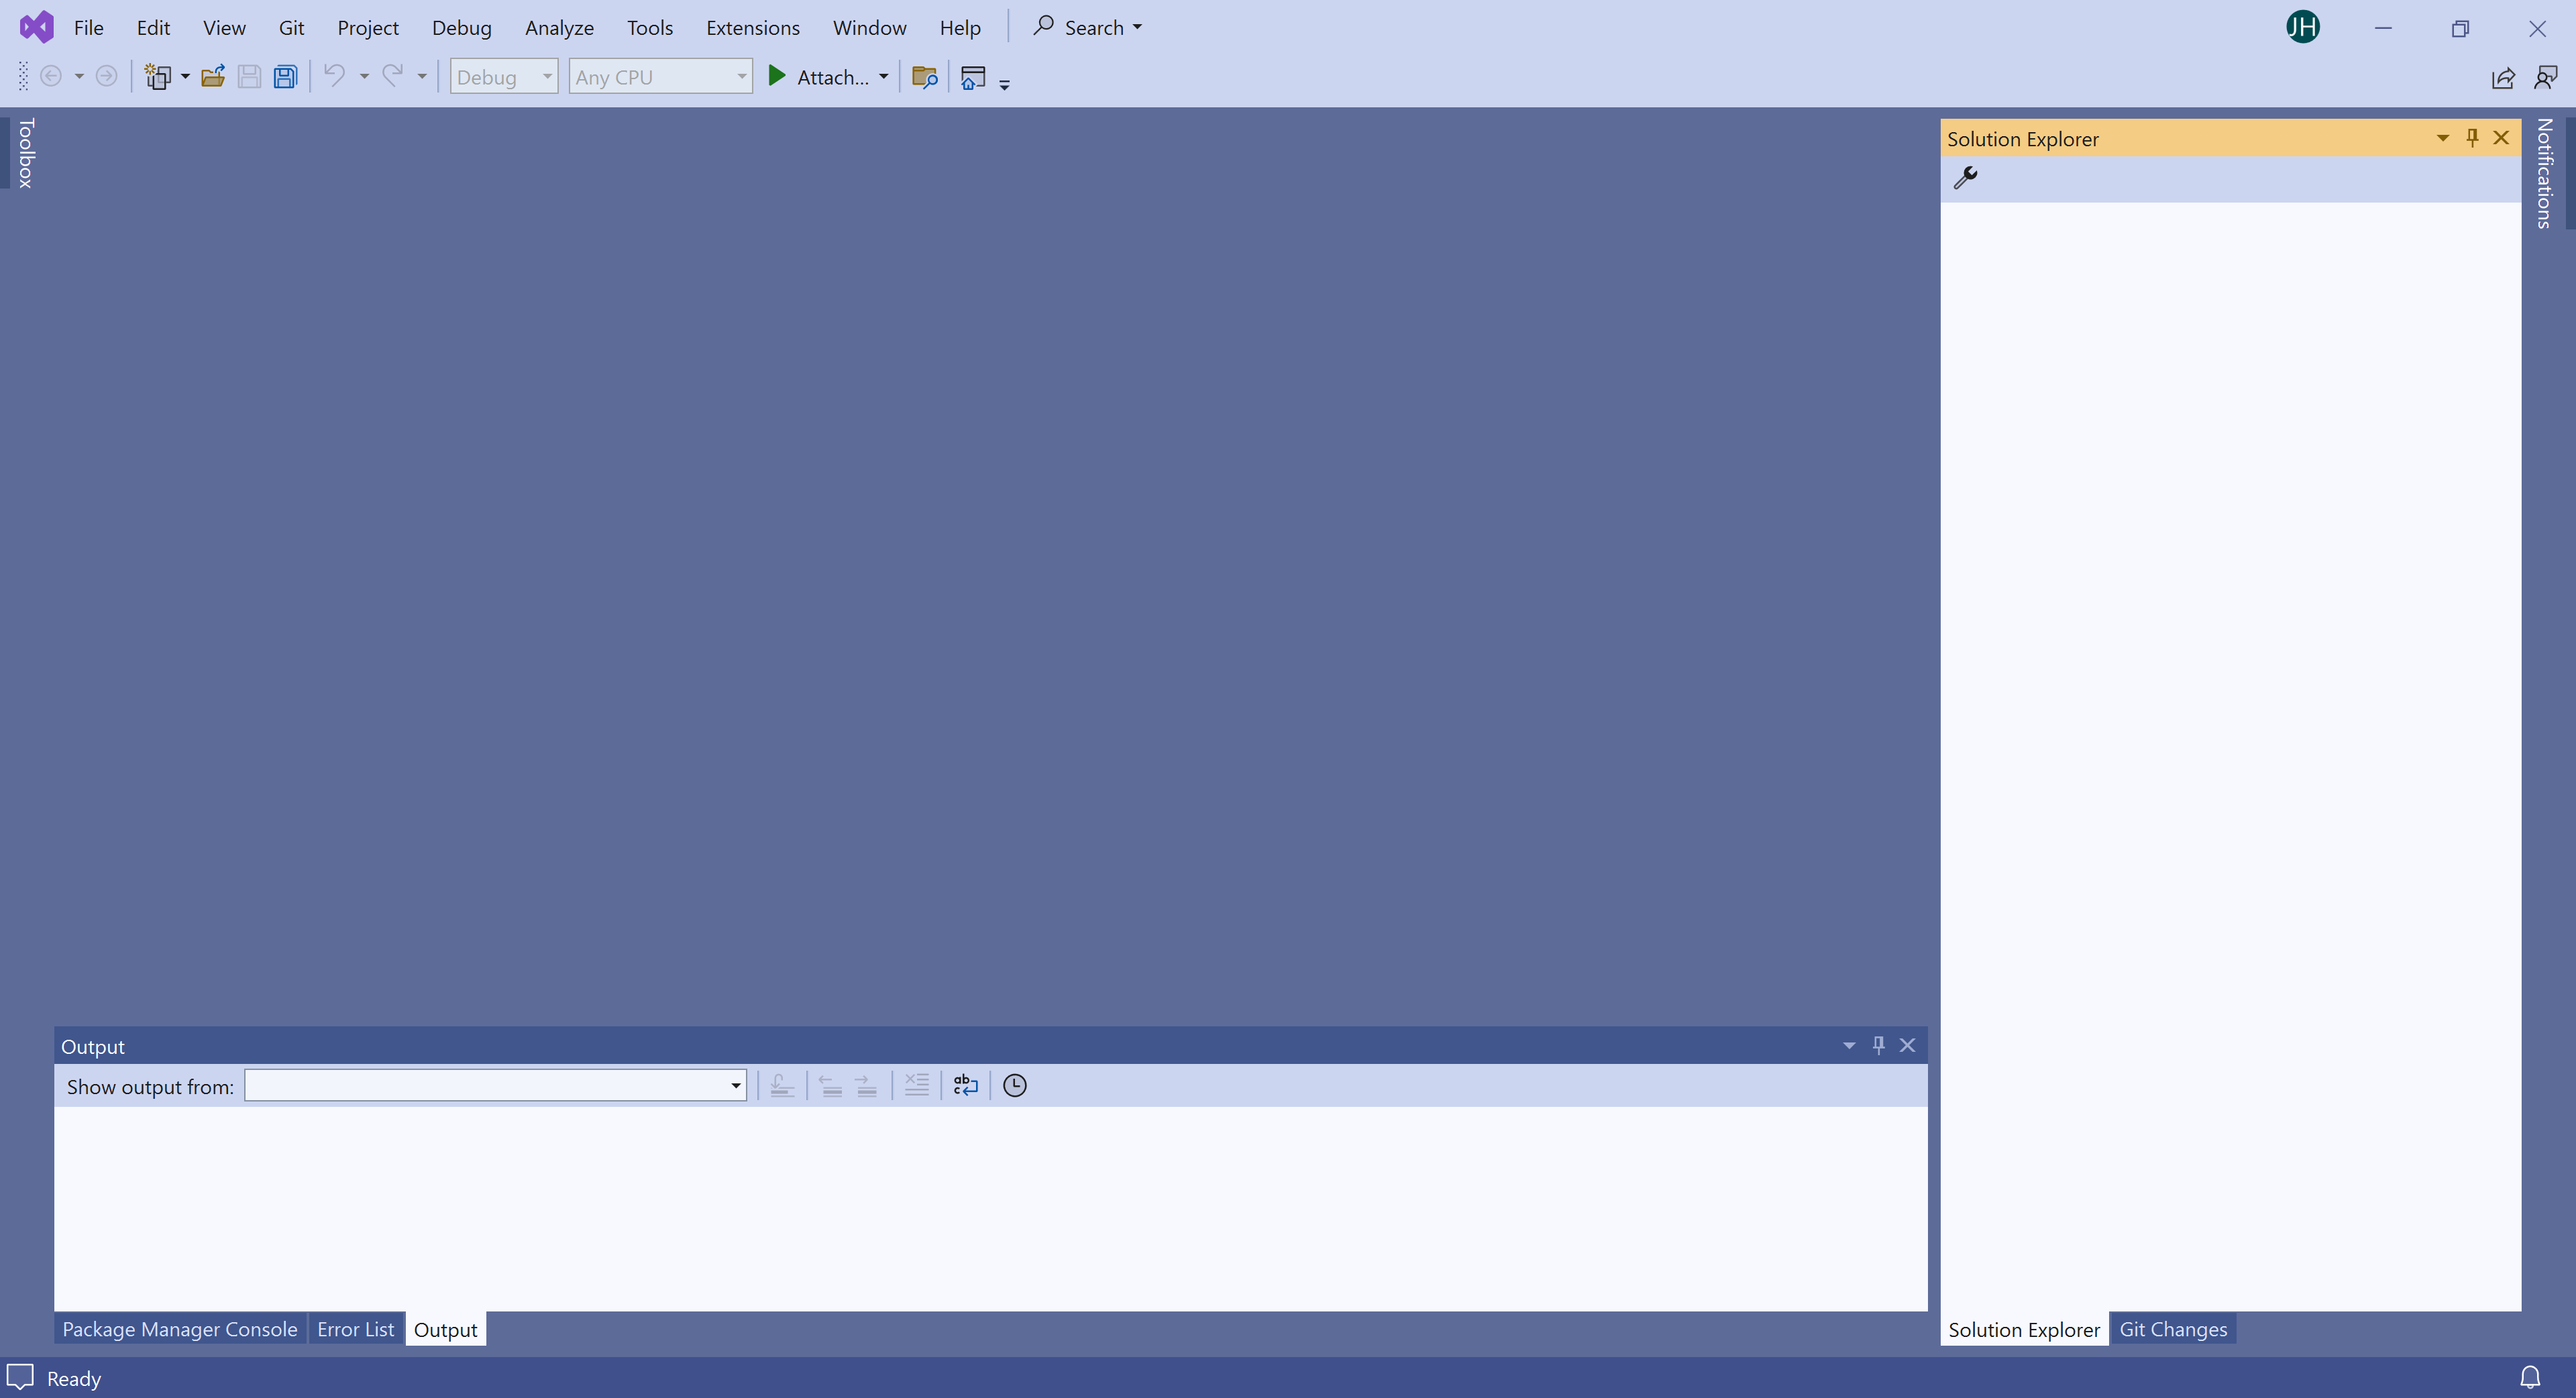
2.
Select
File >
New Project… (
Ctrl+Shift+N)

3.
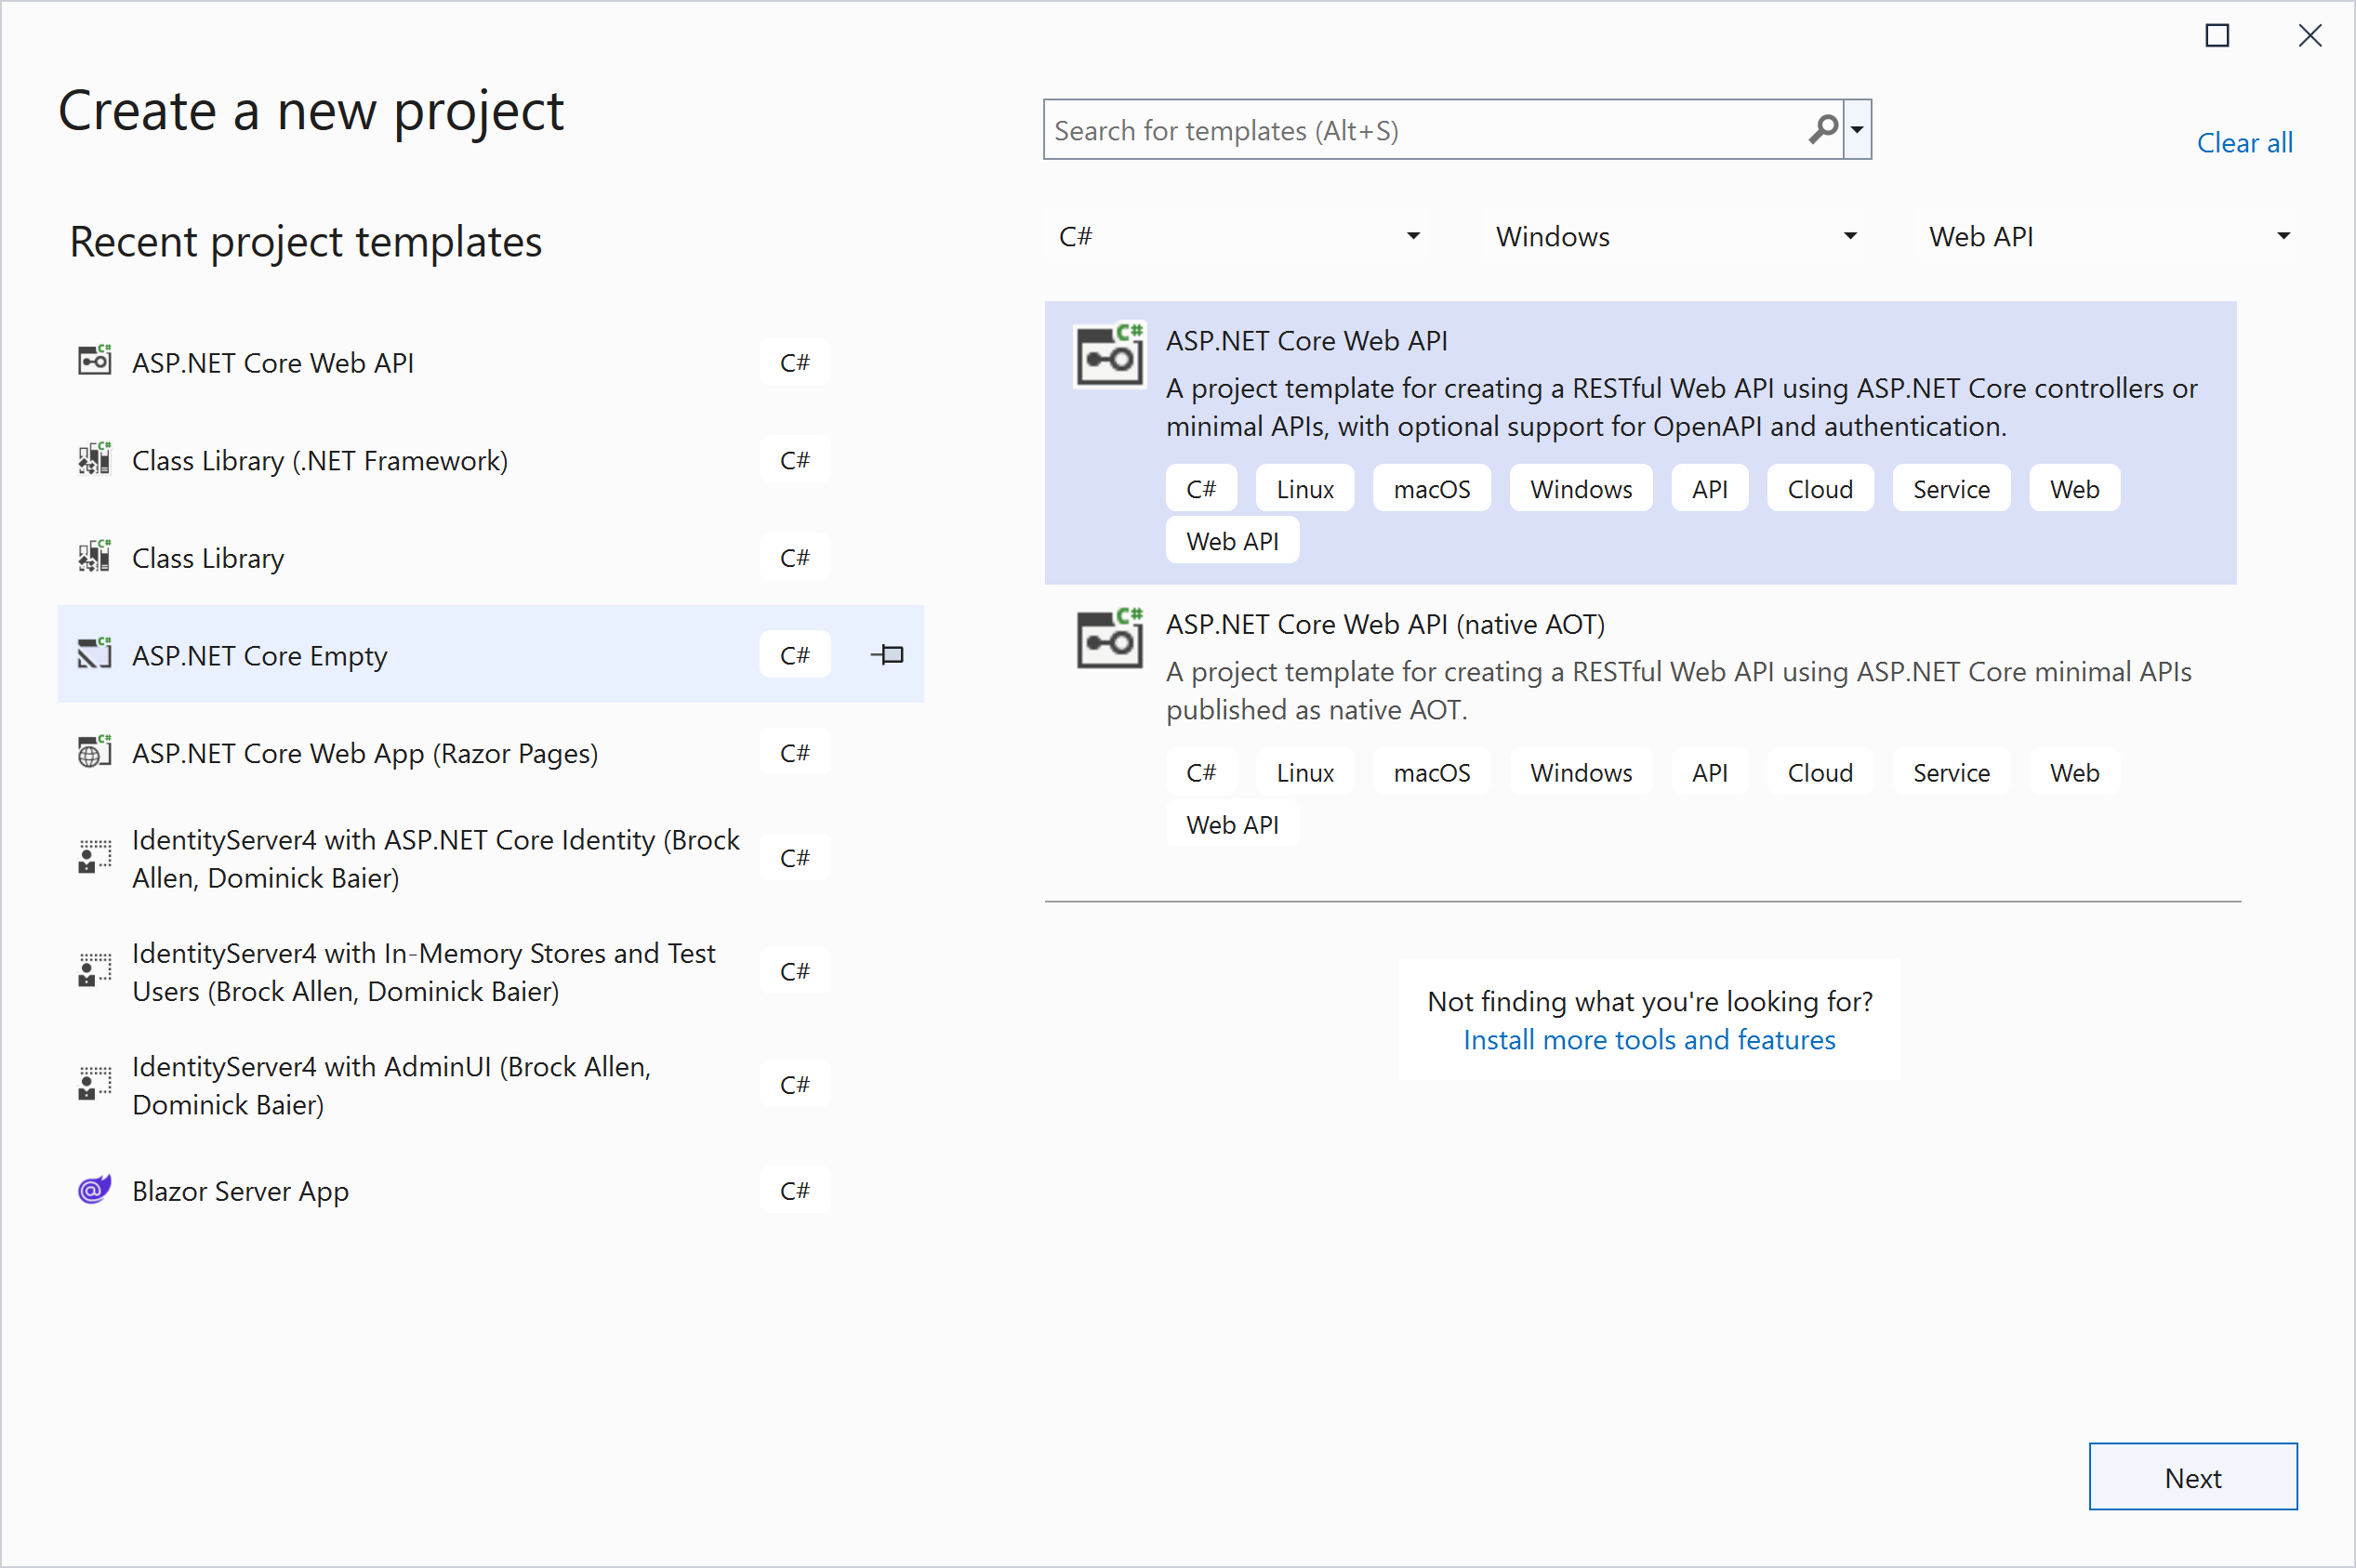
In the Create a new project window, select
C#,
Windows,
Web API in the dropdown menus to narrow down the template search. Highlight
ASP.NET Core Web API and click on the
Next button.
4.
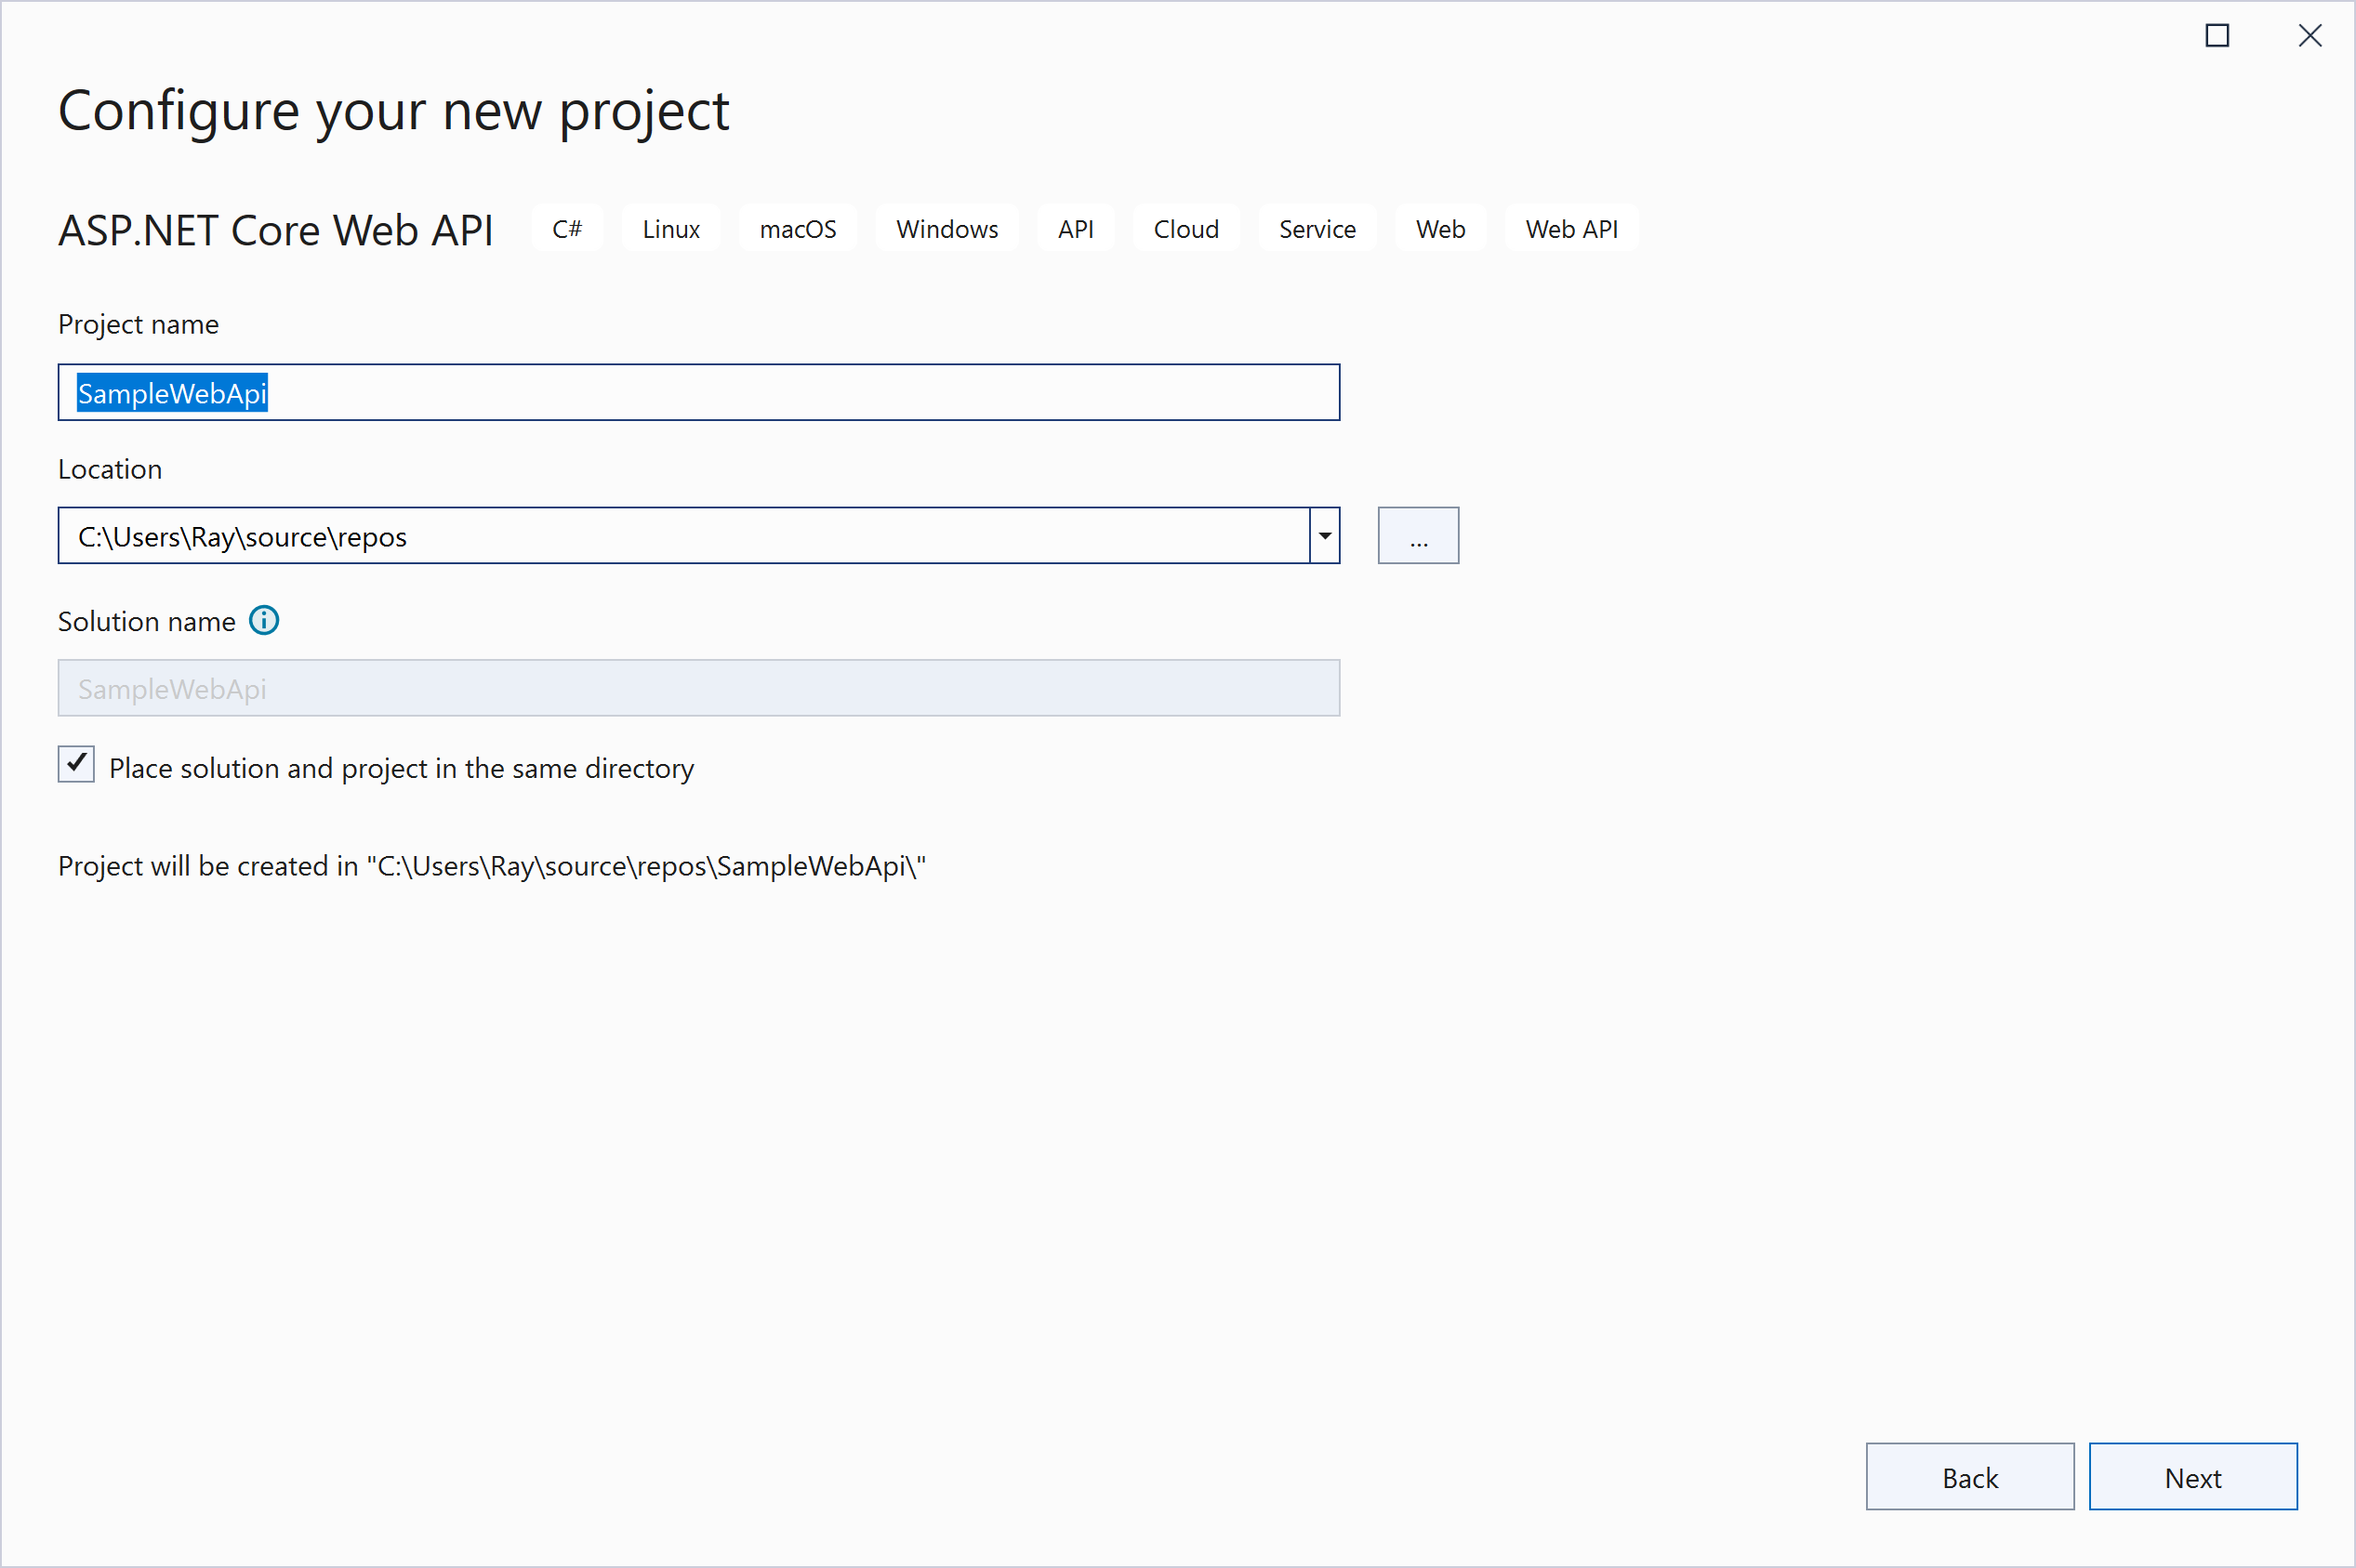
Give your project a name and then click on the
Next button.
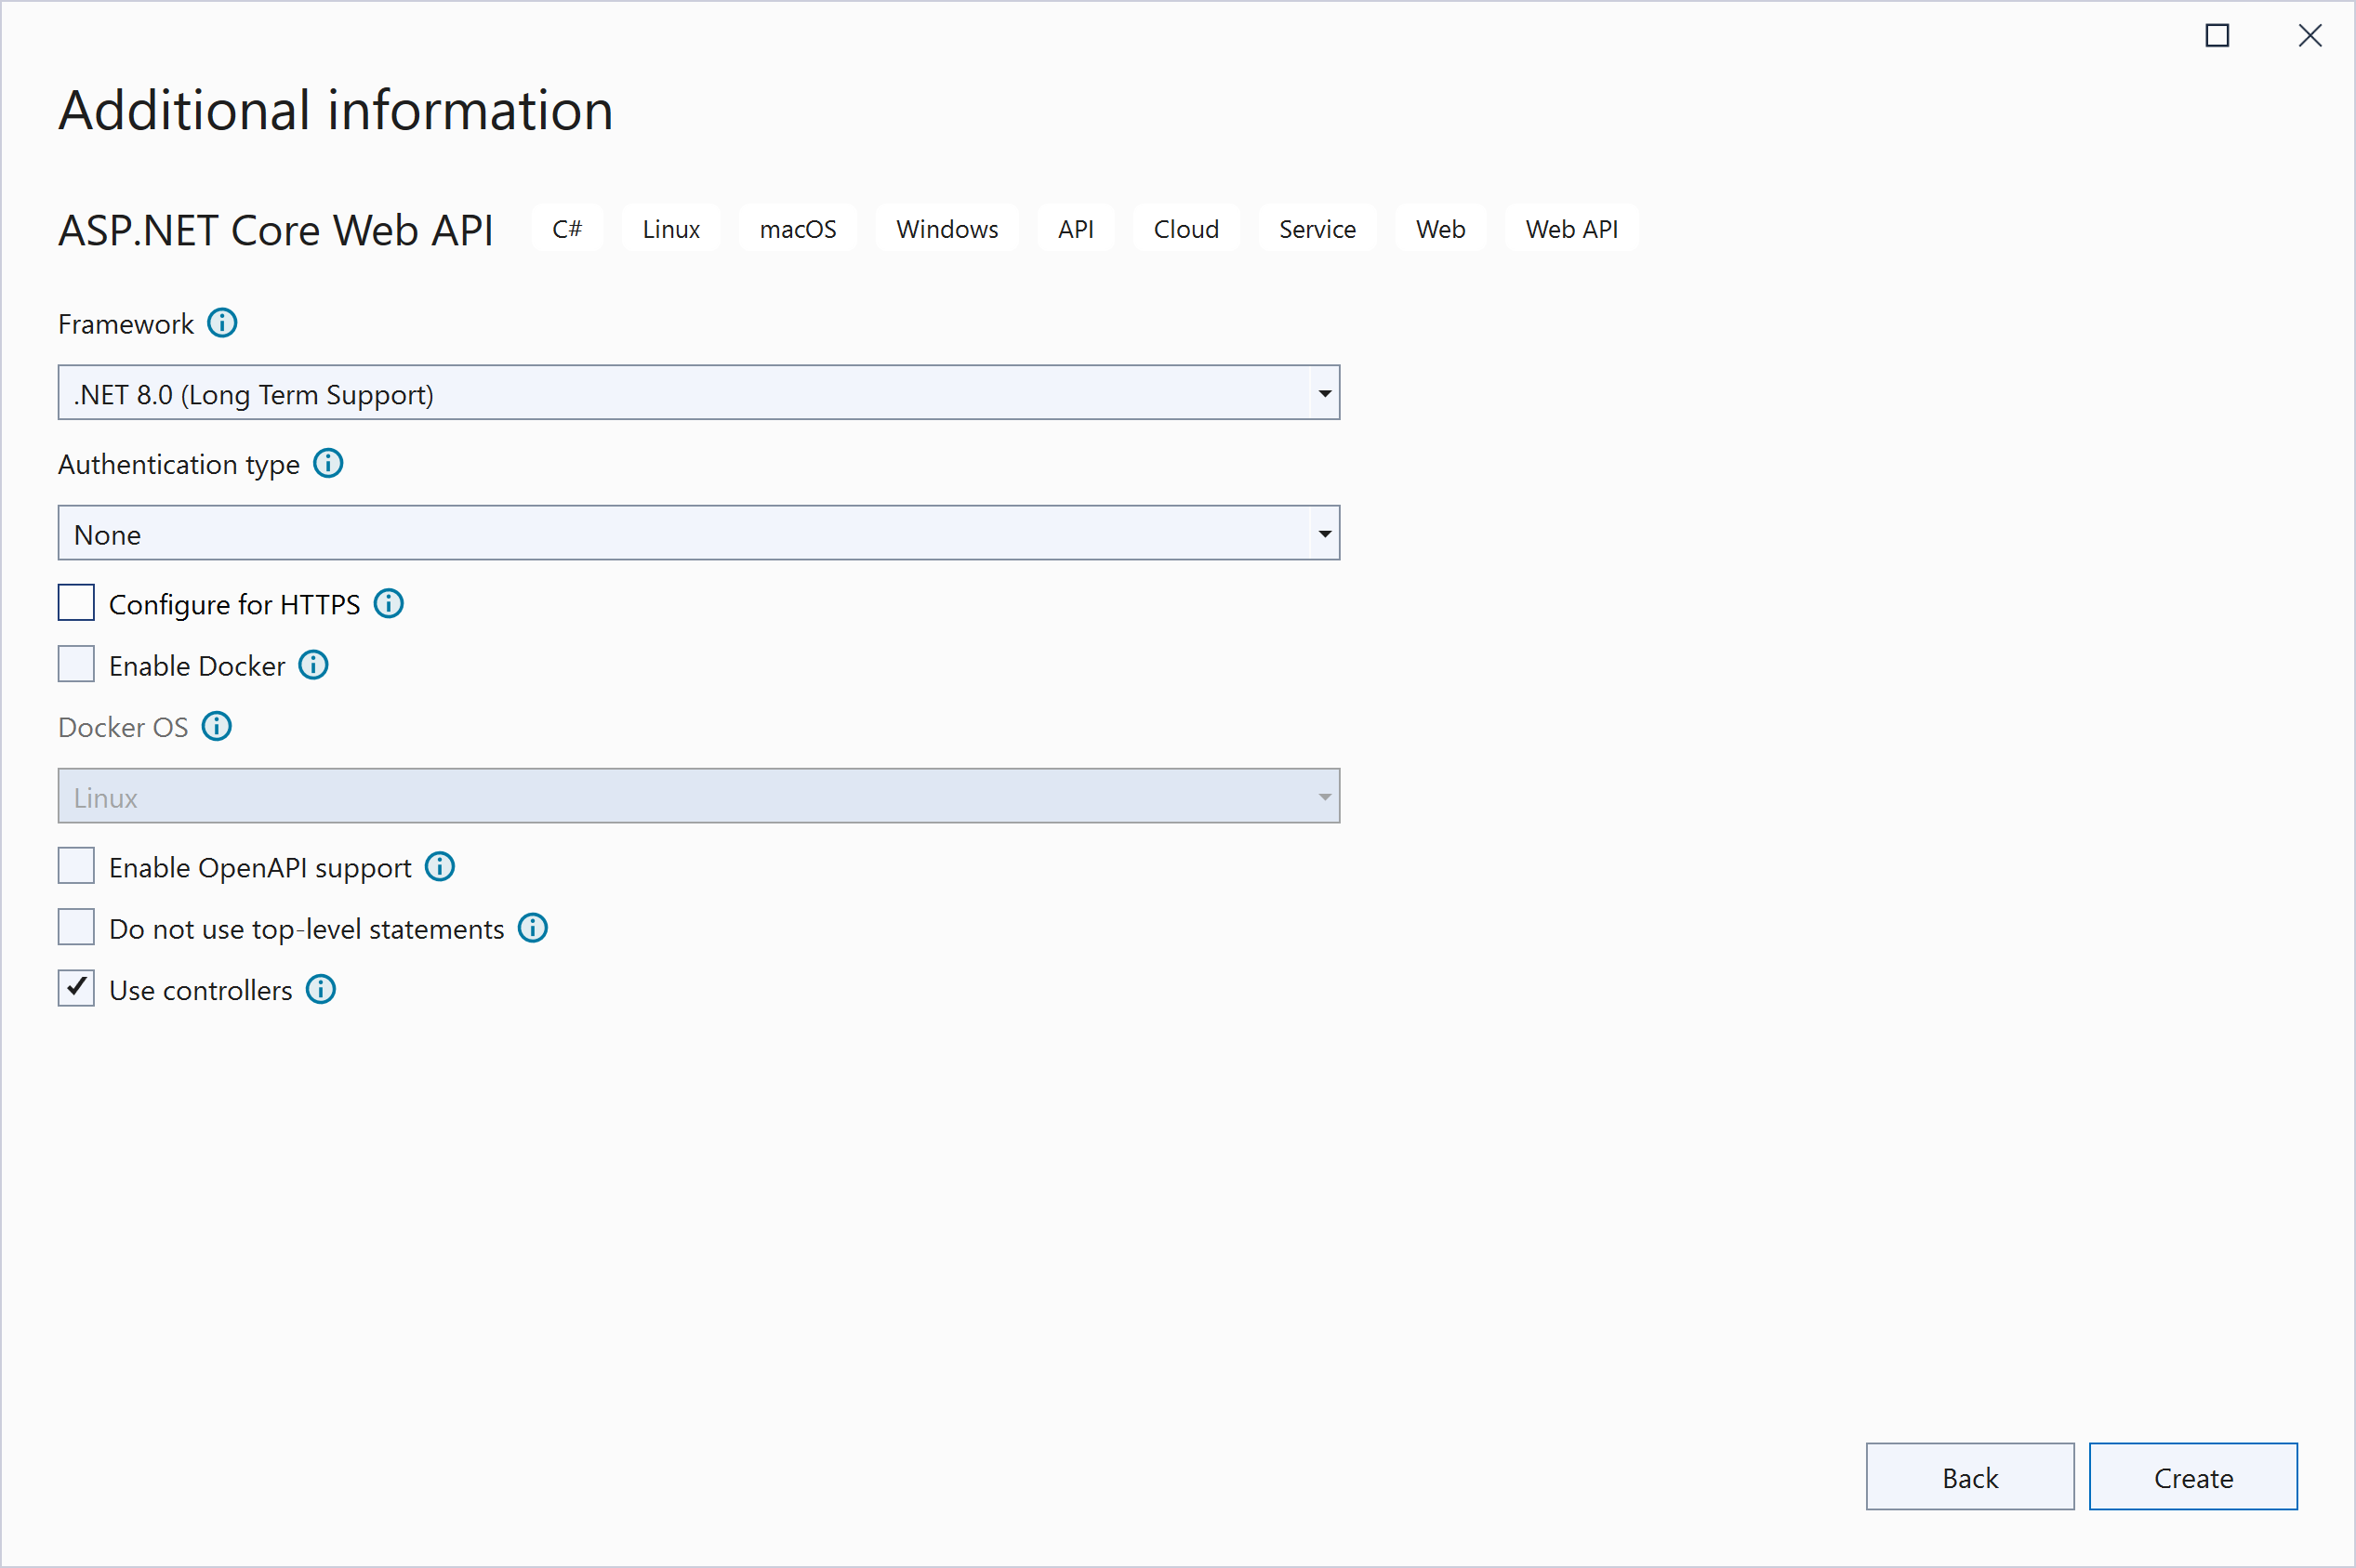
5. Select the project features and then click on the
Create button. (
In this case, I’ve opted to uncheck Configure for HTTPS because it requires an SSL Certificate to be installed in order to work.)
6.
Build your solution by selecting
Build >
Build Solution (
Ctrl+Shift+B). Then hit
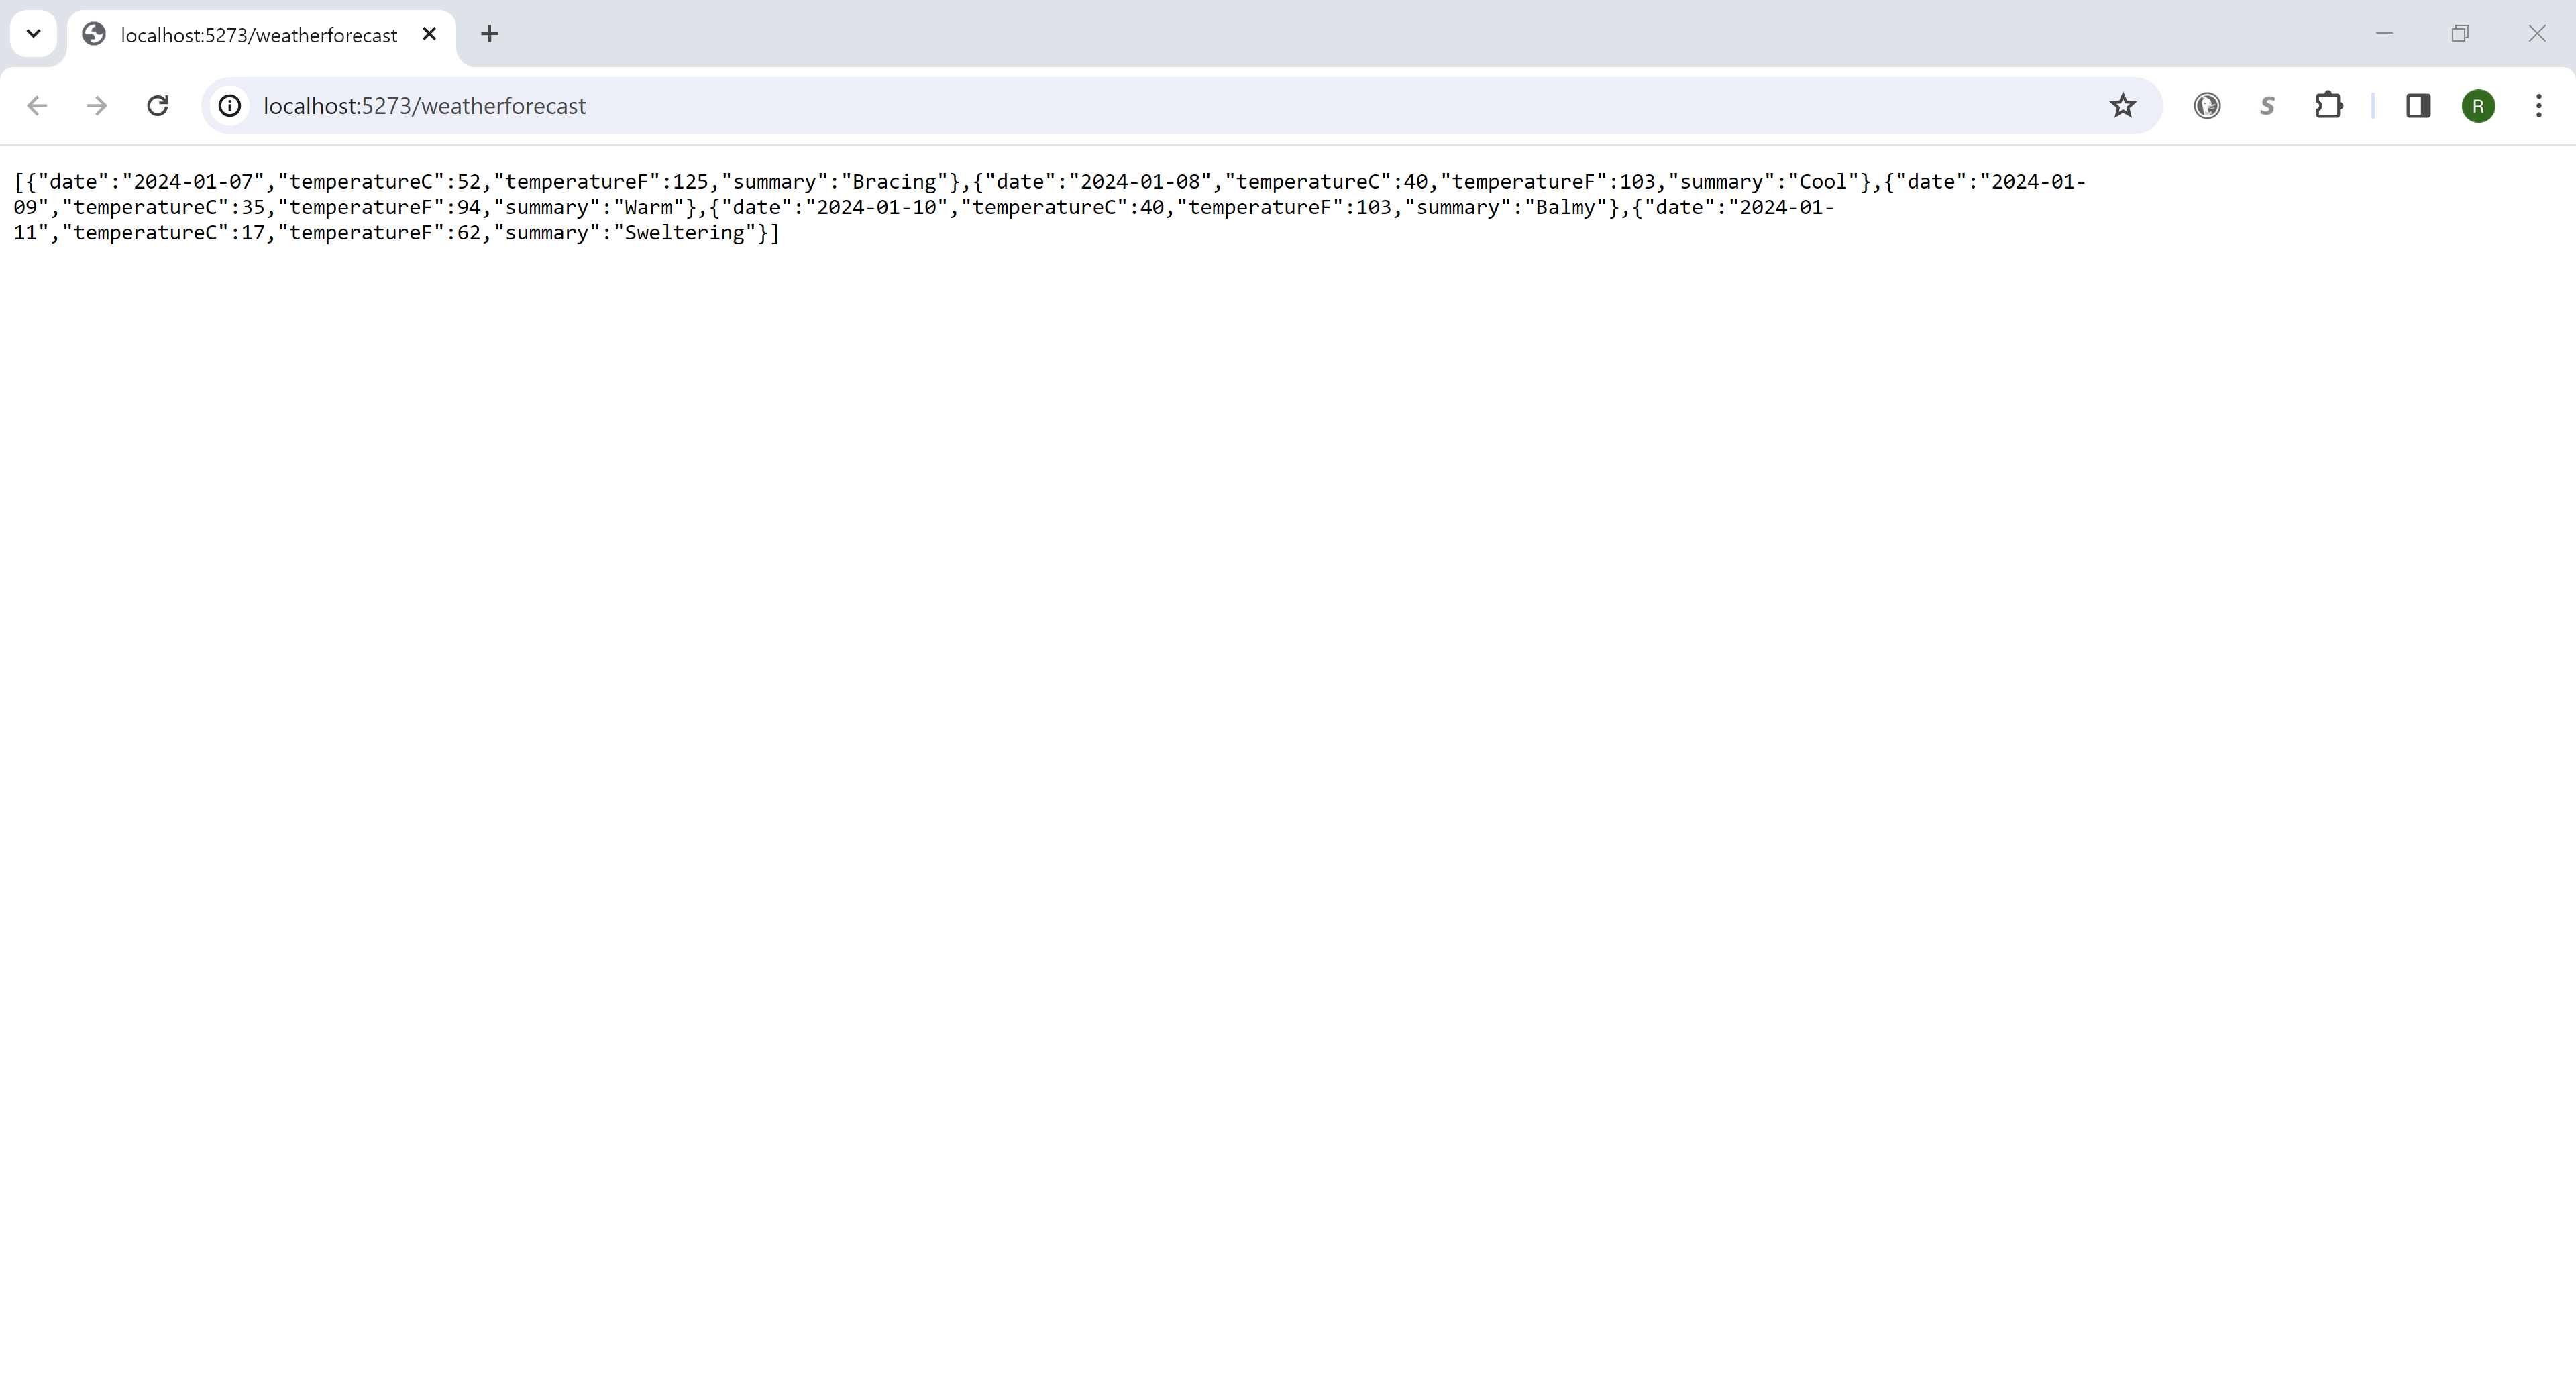
F5 to run it to make sure it’s working. If you are successful, then your browser should launch and return a set of JSON data when you make the service call (
/weatherforecast).
Now that you’ve built and tested your application and have it working locally, you’re ready to deploy it to DiscountASP.NET. Please note this guide is not meant to show you how to code/build the service. There are plenty of guides on the Internet if you do a search, and Microsoft offers an official tutorial here (
Tutorial: Create a web API with ASP.NET Core | Microsoft Learn).
Publishing the Application
7.
Log into the
DiscountASP.NET Control Panel. Click on
Account Info/Edit. Scroll down and click on
Download Web Deploy Publish Settings to download the publishing profile.
8.
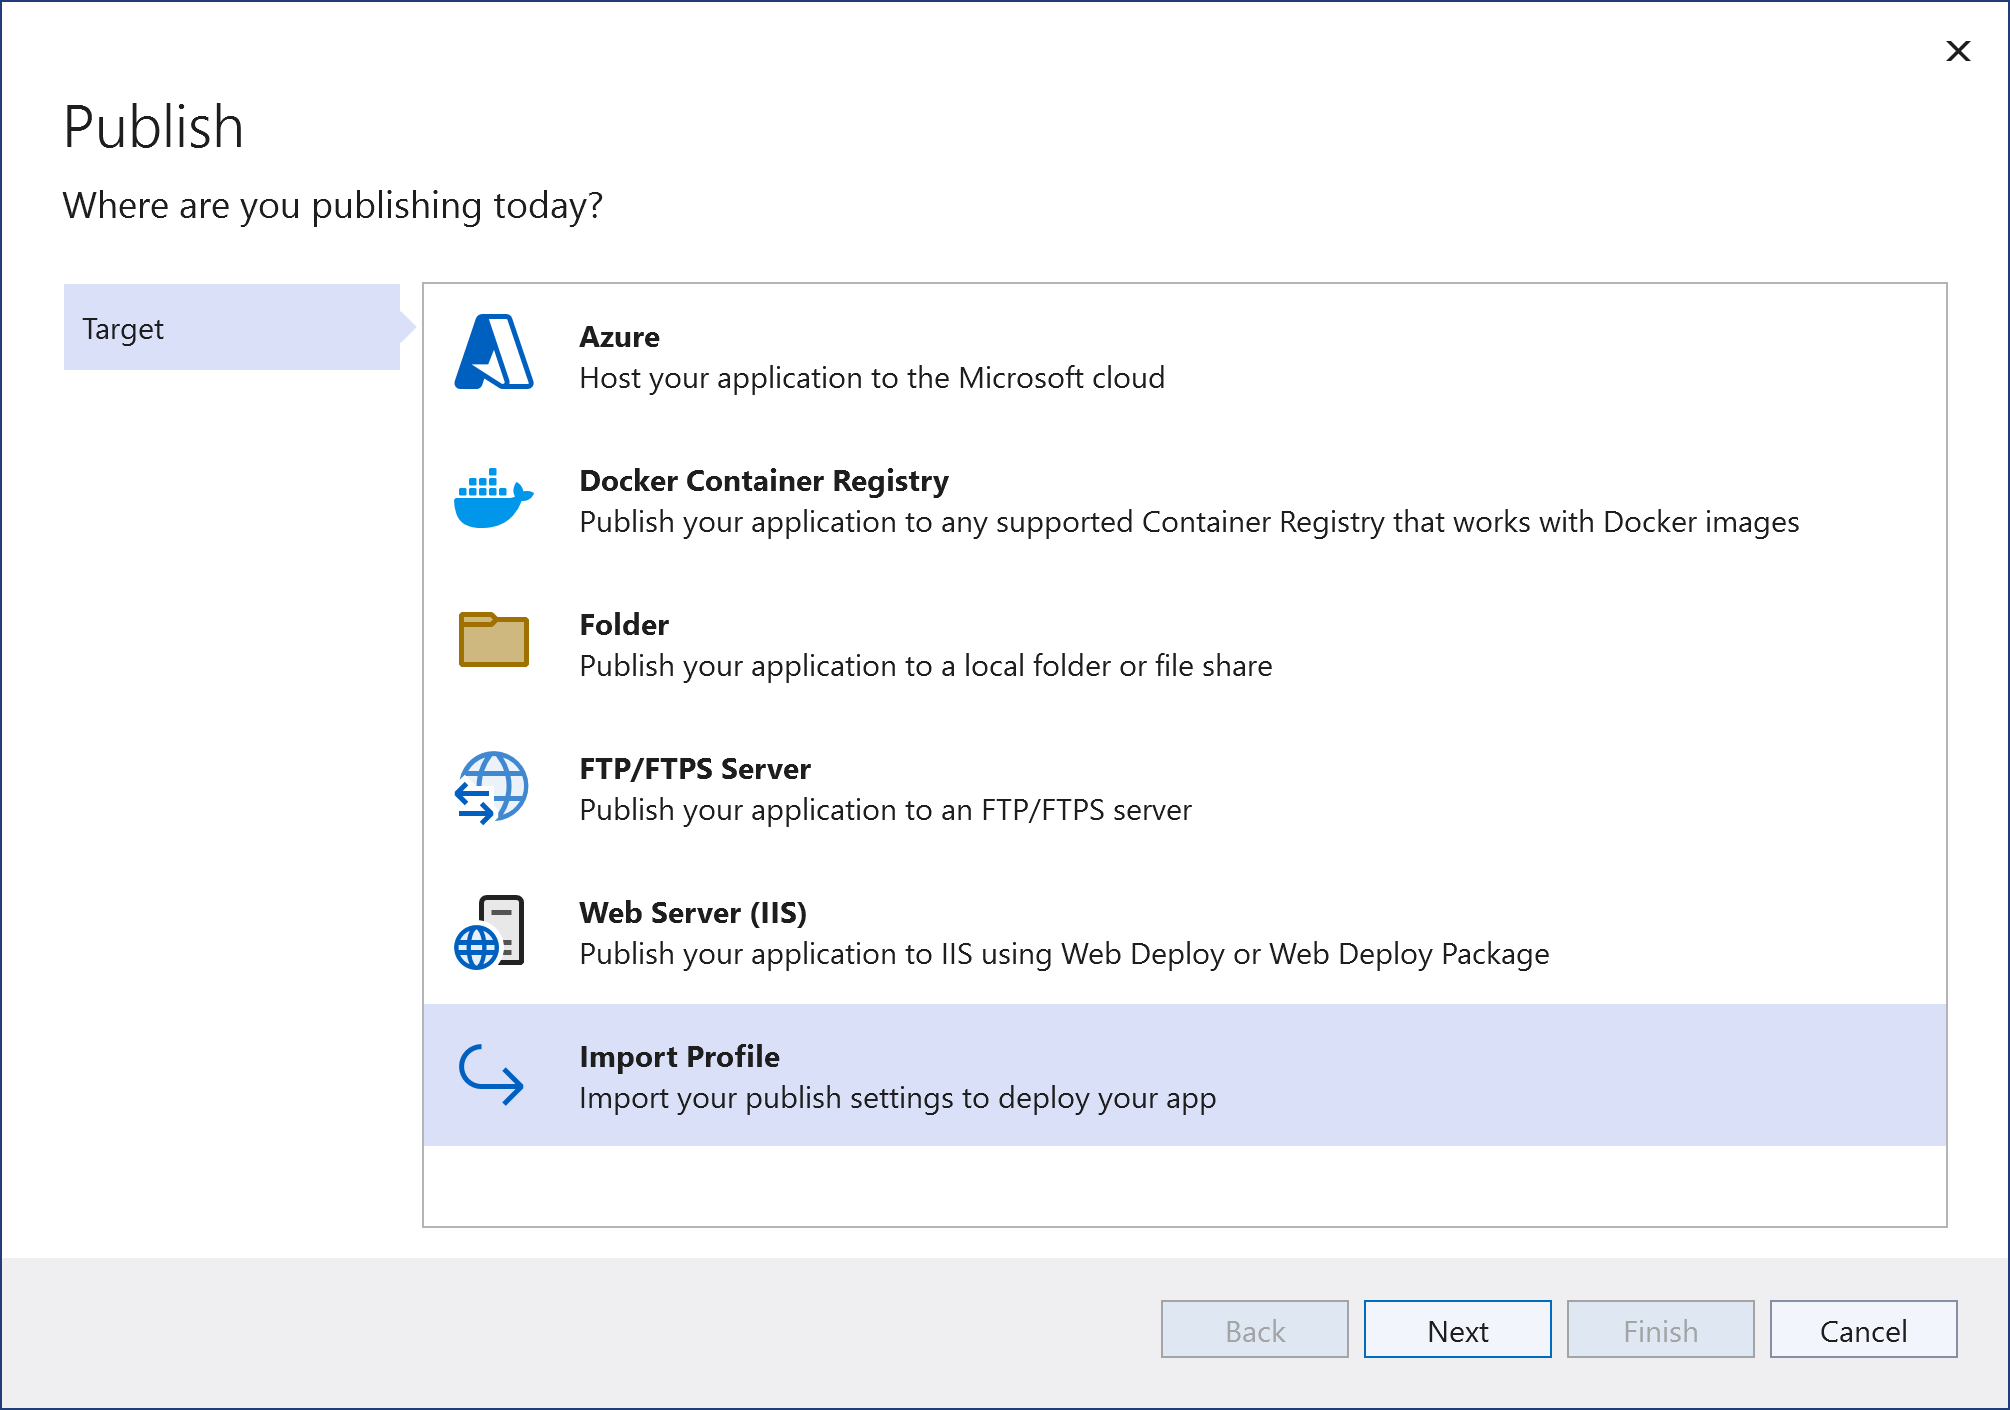
In Visual Studio, select
Build >
Publish and then Import Profile. Click on the
Next button.
9.
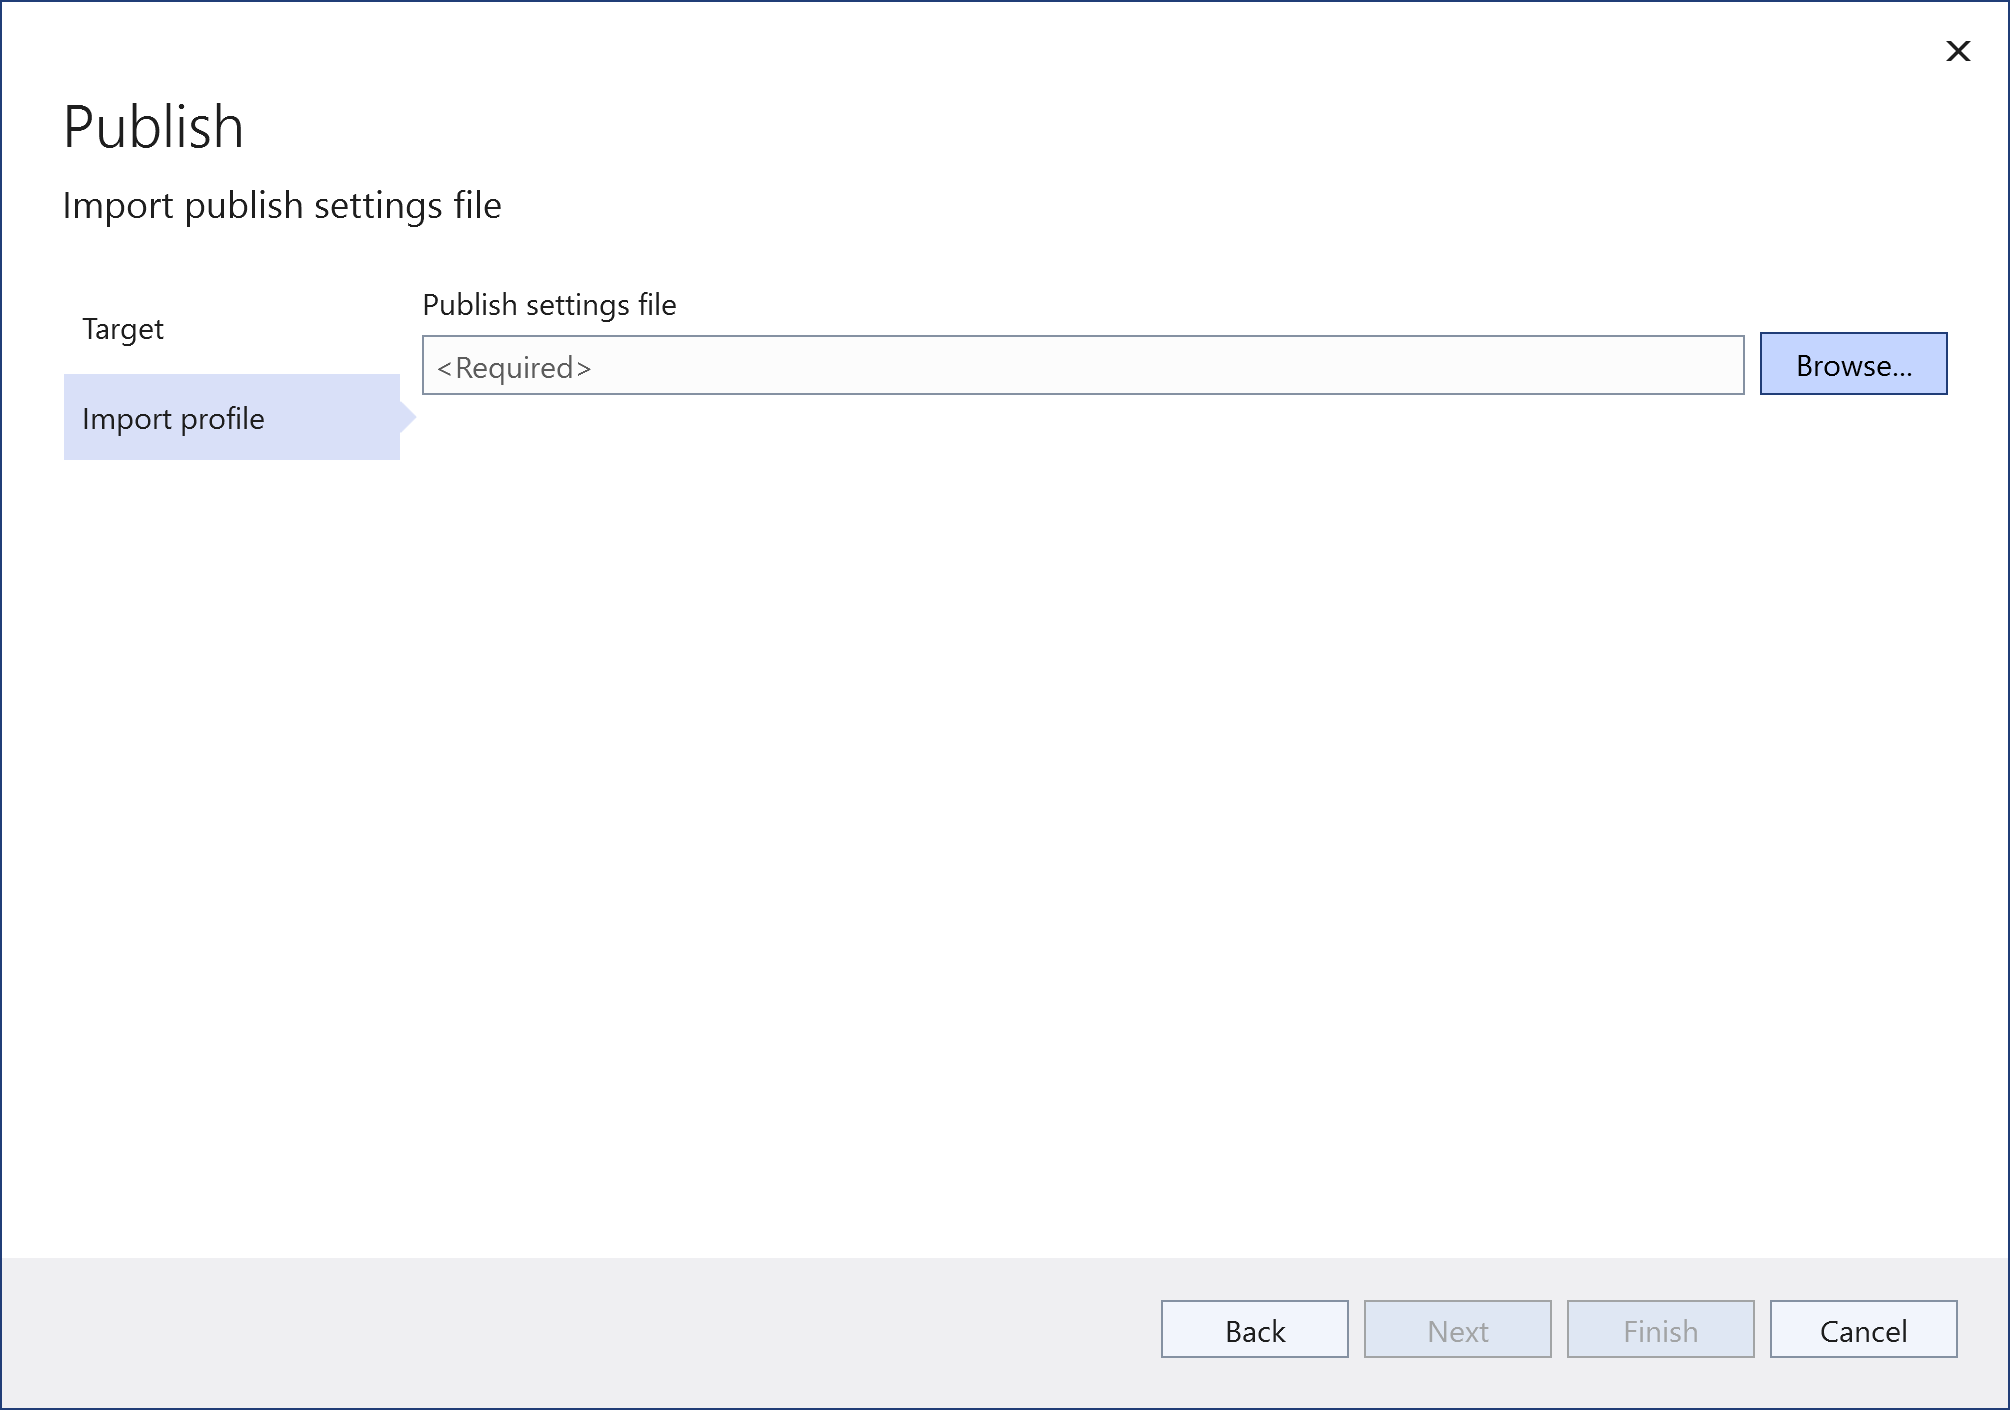
Click on the
Browse button and find the .settings file you downloaded in Step 7. Click on the
Finish button.
10.
The publishing settings should now be imported. Click on the
Close button.
11.
Select the
Web Deploy option in the Publish window dropdown menu.
12.
Click on
More actions >
Edit and then select
Connection. Enter your site password and check the
Save password option. If you want to publish to the root of your website, remove /myapp from both Site Name and Destination URL fields.
13.
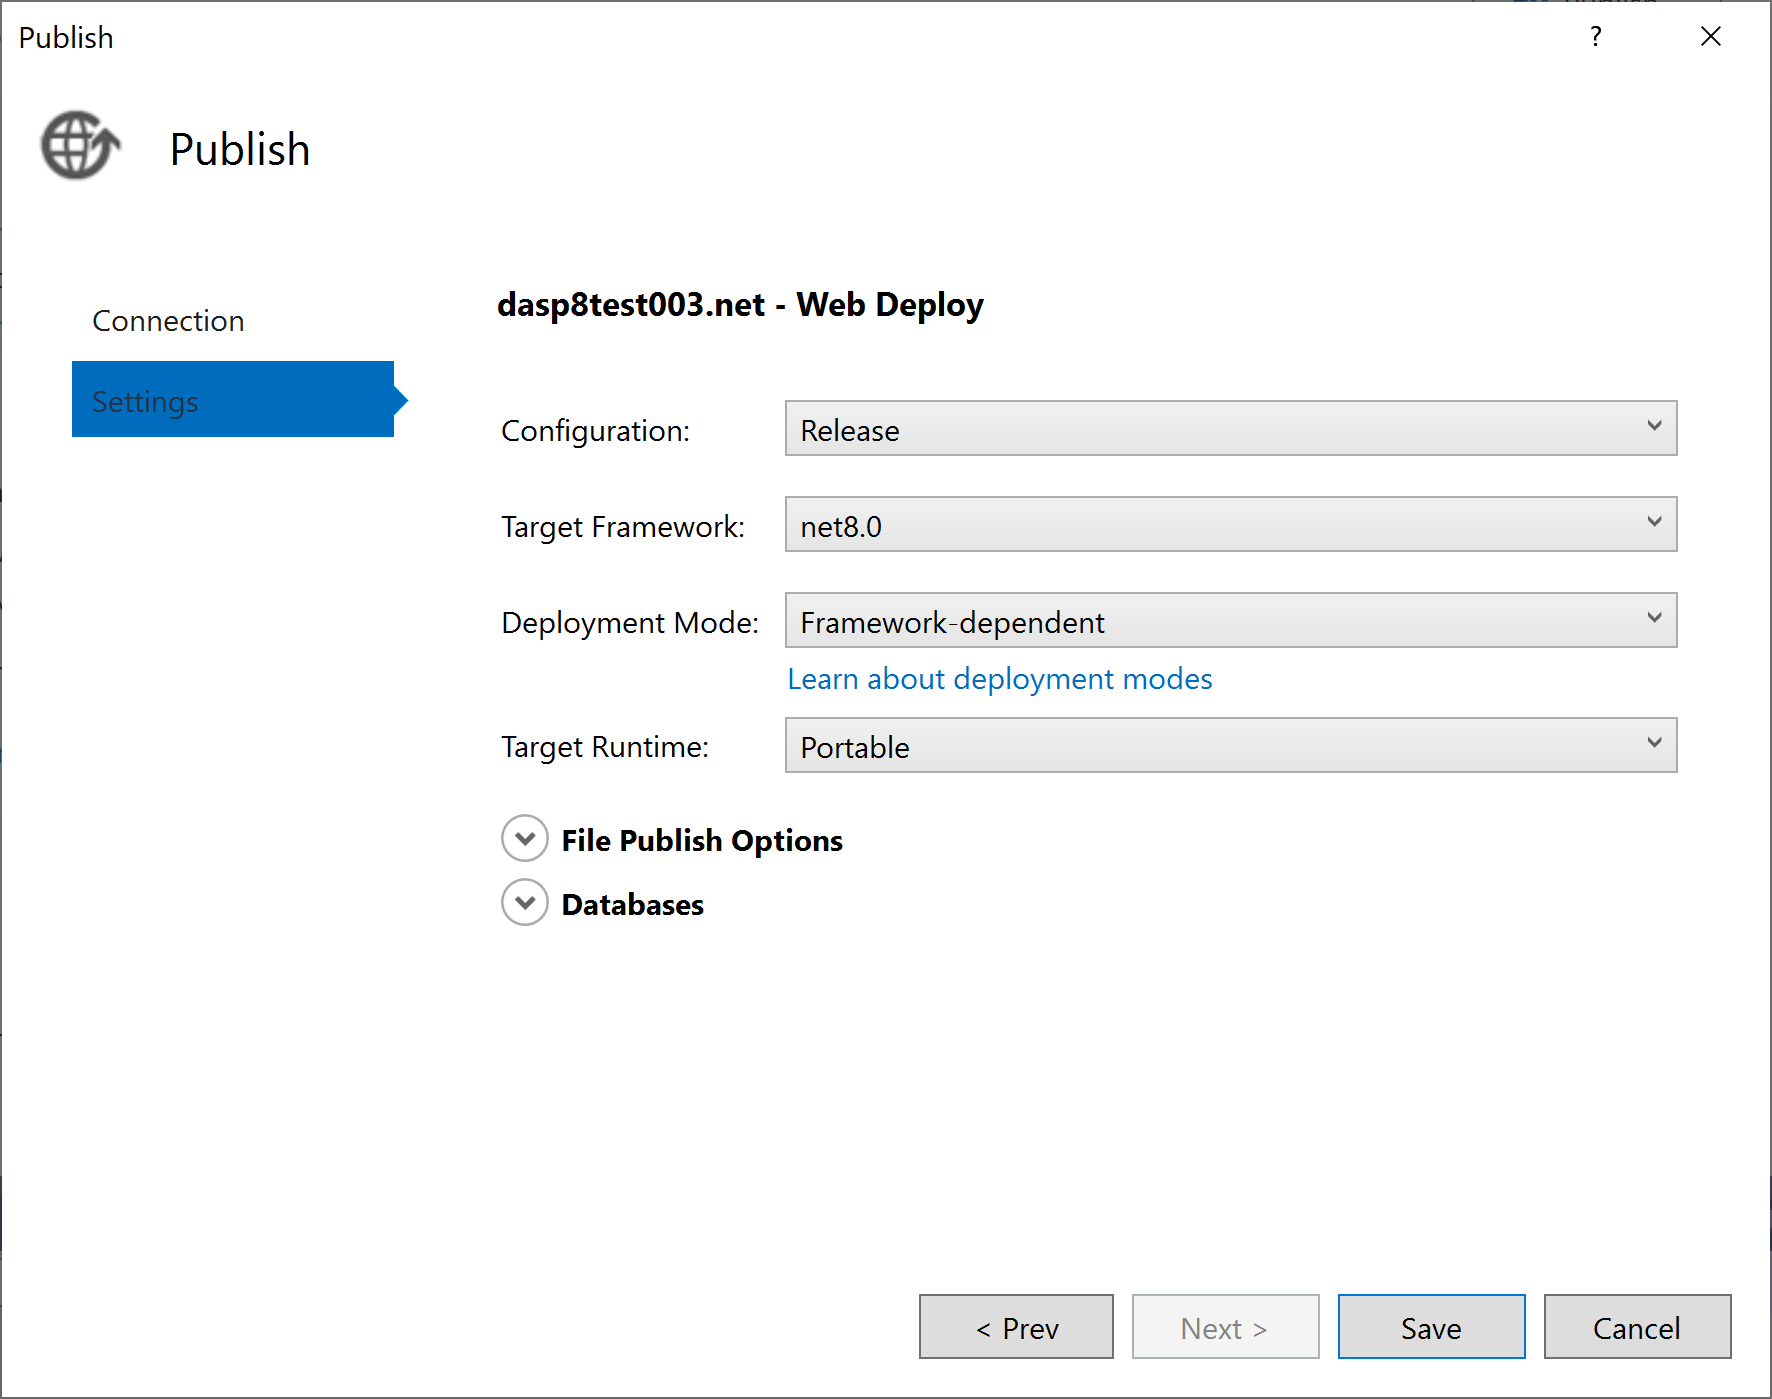
Click on
Settings to change the settings. For the Deployment Mode, Self-Contained will always work. Framework-dependent only works if the libraries have been installed on the server. (
It may not work at times because there’s a delay between when Microsoft releases the new libraries and when we patch our servers. We may not always have the latest release immediately available because it has to undergo testing before we patch.) The Target Runtime can be either Portable or win-x86. Win-x64 is only available if you’ve
submitted a ticket to us to request that we change the application pool settings to support 64-bit applications. You can only choose one or the other (
32-bit or 64-bit). Click on the
Save button when you’re done.
14. Click on the Publish button to publish the files to the server. Once the files have been published, your application should automatically launch. Enter one of your API endpoints to test your service (e.g. /weatherforecast). If everything was done correctly, you should get the same results as in Step 6.
Please note that if your API doesn’t work correctly, there’s not too much we can do to troubleshoot the issue without reviewing your source code. Things like routing, using absolute/relative paths in your code, publishing to a sub-directory instead of the root, etc. can affect how you access the service. For example, some setups add a /api before calling the actual service. You can try turning on
ASP.NET Core Error logging to help you troubleshoot the problem. In most cases, if it’s coded correctly and working locally, then it should work on DiscountASP.NET as well.